Nova Headliner Replacement
I decided to replace the headliner – BTW, it’s not wise to do the headliner “after” the carpet. You wouldn’t believe the mess I had to clean up when I ripped the old headliner out! At some time there had been a family of mice living up there and all kinds of seeds, insulation and junk were hiding up in the headliner.
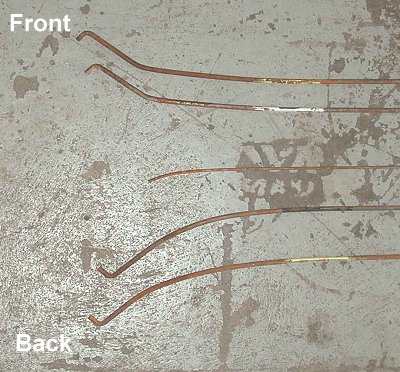
As I was pulling the old headliner out I marked each bows location so I could put them back in the same hole in the roof, and I also marked each bow. Here’s a picture of the bows from front to back, note the color codes that GM used, that must have been how they kept track where they went at the factory

I sanded the bows down and repainted them (make sure and tag them so you don’t get them mixed up). This was done to help the new headliner slide easier on the bows.
Next I laid the headliner out in the sun for a while to get the wrinkles out of it. The most important thing I can stress when putting a headliner in is GET ALL THE WRINKLES OUT BEFORE YOU PUT IT IN THE CAR!!! – I didn’t, I got in a hurry and figured that after I started stretching it they would come out.. wrong! Do whatever you need to do, but don’t start putting the headliner in until all the wrinkles are gone. The problem area I had was where the headliner was folded in the box, these proved to be a bear to get out – I should have ironed the headliner would have made things a lot easier!
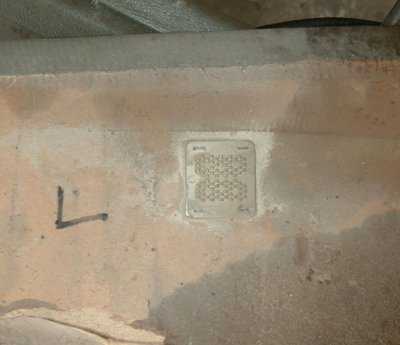
Here’s a picture of the sail panel hook mounts, these need to be transferred over to your new sail panels. Take your time and get them in the exact same position as the old locations or you’ll regret it when it comes time to reinstall the panels. The little staples that hold them in are easy to pry out with a small screwdriver, I reused the staples and also used contact cement on the back of the plastic to make sure it stayed in place.

Recovering the new sail panels is easy, just spray contact cement on both the sail panel and the material, give it a few minutes to tack up then carefully put the material on. Look at your old sail panels and do the new ones the same way, the material wraps over only at the top and bottom, not the front and back. Sorry, I didn’t shoot pictures of everything as I did it.
The metal trim that holds the edge of the headliner was starting to rust, so next I removed them, sanded them down and repainted them.

Next I found the center of the headliner which is marked on the back with a black line and cut a small V at the front and back of the headliner. This way when you get it in the car you can find the center easier. Now is a good time to make sure you have all the plastic clips that hold the headliner in place, if you don’t got to the junkyard and get some. I found that most GM cars of a similar year used the same clips. For some reason my car from the factory was missing two center clips and I had to get some more. Put all the screws that need to pass through the headliner in before you get started. That way once you have the headliner in the holes will be easy to find. You can just use a razor blade to slit the headliner right over the screw head.
Put the headliner bows into the headliner and get them centered. You’ll find that the material these go into is a lot wider than the bows. Go ahead and slit the bow loops so that the bow hook is visible on both ends before you start. With this headliner there was about 5″ extra material on each side and it’s easier to do cut them outside the car than when inside.
I started putting the headliner in with the center bow first. You’ll find that the plastic clips are sometimes hard to get the bow to snap into. It helps to heat them up first with a hairdryer.

Just start putting the headliner into the clips and the bows into the holes in the mounts, it’s going to look nasty for a while until you start stretching the headliner out, doing worry about it at this point. I got 6 boxes of heavy paper clips, those things are a big help, I highly suggest getting a bunch of them before you start this.


Once I had it pulled out as straight as possible I used contact adhesive around the edges and put paper clips everywhere

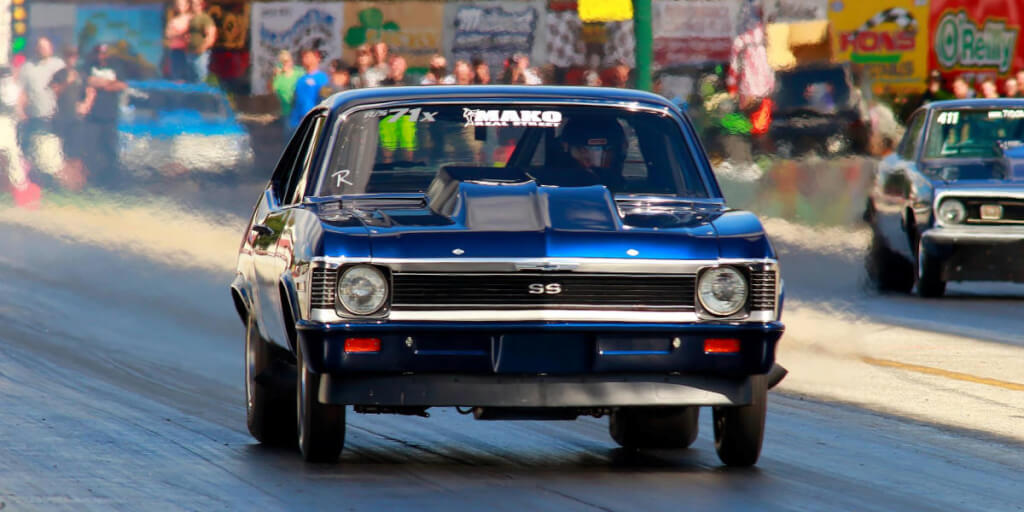
Here’s the headliner all installed, you can still see a few small wrinkles (those shipping folds I mentioned earlier. Luckily after a few weeks these disappeared, but I’d still recommend ironing the headliner before you start.

After it was all said and done, I’m really happy with the end results which look every better than the picture above and it wasn’t really all that hard to do. I still need to find a good way to clean my sun visors, which are black material just a little dusty.


Still need new door panels and the dash needs cleaned and detailed, but it’s a vast improvement over the old interior.


Comments (6)
Thank you, out of all the pictures, forums and video’s I’ve seen. This one helps more than any of them. I took the headliner out of this car 20 years ago and could not remember if the smaller center bow is supposed to be used to hold up the liner. I think it is. Please respond. Thanks,Darian
It’s been 12 years since I did this so memory is a bit fuzzy, but yes that center one does hold it up as it snaps into little plastic clips. I don’t think the ends stick into the body though, I think that one just floats. Again, not certain but I do remember the little clips that center one snaps into.
what is the distance between between each bow? reason being I am not around the customers car now and needing a quick measurement to sew up there headliner in time for them?
Matt I have no idea, it’s been like 9 years or so since I wrote that article. I don’t have the ability to measure it for you right now.
Mr.Heard I would like to get the paint formula, that Tims in Joplin painted your car. I’m thinking it looks like Lexus AP8 Blue Indigo but do you know if they added extra pearl or anything. If you could could you E-Mail the formula to me at Buckwild7575@gmail.com. Fixing to restore my pick up and love this color.
Thank You for your time
No, I don’t believe any extra pearl or anything was added.
Comments are closed.